
Lock It In: The Ultimate Guide to Sealing Your Concrete Driveway
Protect Your Investment: Why Concrete Driveway Sealers Matter
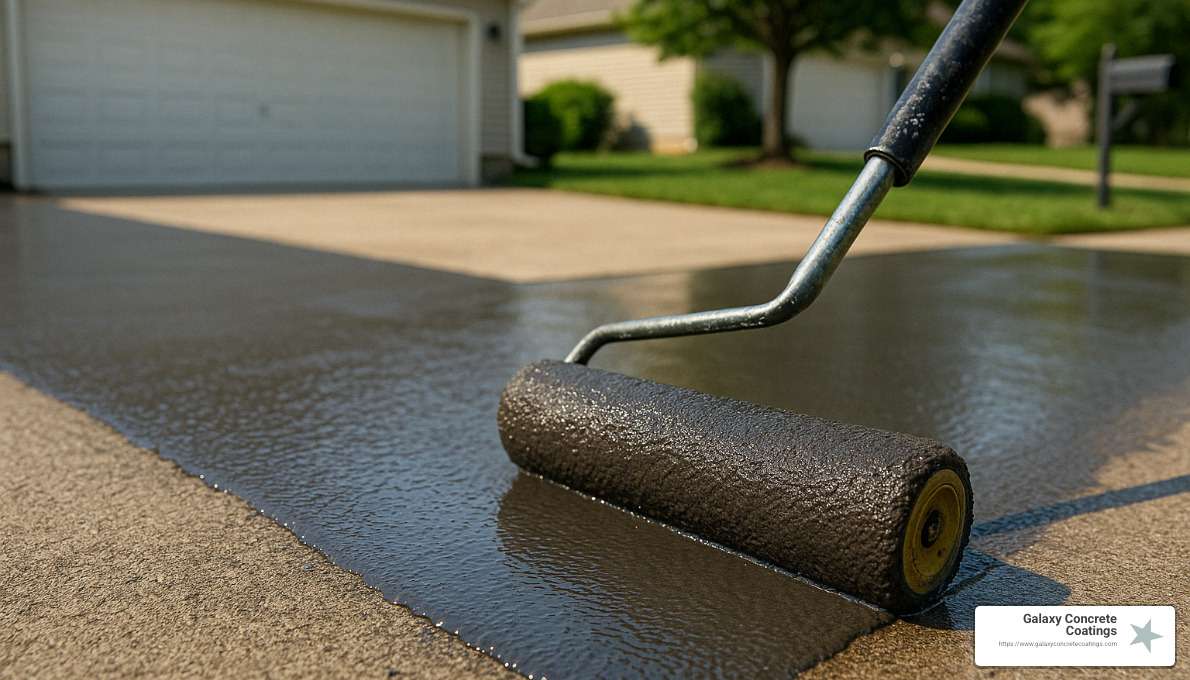
Concrete driveway sealers are protective coatings that extend the life of your driveway by creating a barrier against damage from weather, chemicals, and daily wear. Here’s what you need to know:
| What You Need to Know About Concrete Driveway Sealers |
|---|
| ✅ Extends driveway life by up to 10 years |
| ✅ Protects against water, oil, UV damage, and freeze-thaw cycles |
| ✅ Reduces maintenance costs by up to 50% |
| ✅ Application typically requires resealing every 2-10 years |
| ✅ Available in penetrating or film-forming varieties |
Your concrete driveway faces constant threats – from harsh UV rays that fade its color to oil spills that leave stubborn stains. Without proper protection, these elements will gradually deteriorate your driveway, leading to cracks, spalling, and expensive repairs.
As one concrete expert notes, “Concrete sealers are not an add-on that professionals push to make more money. In fact, they end up saving customers money in the end.”
When sealed properly, your driveway doesn’t just last longer – it looks better too. A quality sealer improves color, adds shine if desired, and makes cleaning significantly easier.
While traditional sealers offer good protection, polyaspartic coatings provide superior performance with faster curing times, exceptional durability, and outstanding resistance to chemicals, UV rays, and abrasion.
I’m Hayley Shahbazi, Galaxy Concrete Coatings Manager with experience in concrete driveway sealers and polyaspartic coating applications. My work developing and refining our concrete sealer products has helped countless homeowners extend the life of their driveways while enhancing their homes’ curb appeal.
Understanding and Choosing Concrete Driveway Sealers
When it comes to protecting your concrete driveway, not all sealers are created equal. Selecting the right concrete driveway sealer is a bit like choosing the right sunscreen – the wrong choice might leave you with damage that could have been prevented. Let’s break down your options so you can make the best choice for your home.

Types of Concrete Driveway Sealers
The world of concrete driveway sealers is primarily divided into two main families: penetrating sealers that work from within and film-forming sealers that protect from the surface. Think of it as the difference between moisturizing your skin versus applying a protective glove.
Penetrating Sealers
Penetrating sealers are the quiet protectors of the concrete world. They sink into your driveway’s pores and create an invisible shield against moisture and contaminants without changing how your concrete looks.
These sealers contain tiny molecules that dive deep into the concrete where they have a chemical party with the concrete components, forming a solid barrier that keeps water and other unwanted guests out. It’s like waterproofing your driveway from the inside out.
The beauty of penetrating sealers is their subtlety. They don’t change your driveway’s appearance, won’t make it slippery when wet, and offer excellent protection against freeze-thaw cycles that can crack concrete in colder climates. They typically last 5-10 years and won’t peel or wear away like surface treatments might.
However, they do have their limitations. If you’re hoping to improve your driveway’s color or appearance, you’ll be disappointed. They also offer less protection against oil and chemical stains, and they generally cost more upfront.
As one of our customers in Denver told me, “I wanted protection without changing the look of my stamped concrete. A penetrating sealer was perfect – invisible but effective.”
Film-Forming (Topical) Sealers
Film-forming sealers are the more visible protectors. They create a protective layer on top of your concrete surface – like a clear coat of paint. These not only shield your driveway but can also give it a makeover.
These products form a protective film that acts as a barrier, preventing water, chemicals, and other substances from reaching your concrete. It’s like putting a raincoat on your driveway.
The advantages here are impressive. Film-forming sealers can improve color, add shine, provide excellent stain resistance, and create a surface that’s much easier to clean. Some types offer exceptional durability, and many have a more affordable upfront cost.
But every rose has its thorns. These sealers can create slippery surfaces (though additives can help with this), typically need more frequent reapplication (every 2-5 years), may show wear patterns in high-traffic areas, and some can yellow or degrade with UV exposure.
Common types include:
Acrylic Sealers – The budget-friendly option that’s easy to apply. They come in water-based or solvent-based formulas, typically last 1-3 years, and offer moderate resistance to chemicals and abrasion with good UV protection. They’re like the entry-level option – accessible but not the most durable.
Epoxy Sealers – The tough guys that create a hard, durable surface with excellent chemical and abrasion resistance. They typically last 3-5 years but have limited UV resistance (they can yellow over time) and require a longer cure time (24-72 hours). It’s like having a plastic shield over your concrete – tough but somewhat inflexible.
Polyurethane Sealers – More flexible than epoxy with good chemical and abrasion resistance, better UV resistance, and moderate cure times. They typically last 2-5 years. Think of them as a happy medium between acrylic and epoxy options.
Polyaspartic Coatings – The premium choice with exceptional durability and longevity. They offer superior resistance to UV rays, chemicals, and abrasion with rapid cure times (ready for use in hours). Typically lasting 7-10+ years and working in wide temperature ranges, these are the luxury option that pays for itself over time.
| Sealer Type | Durability | UV Resistance | Chemical Resistance | Appearance | Drying Time | Typical Lifespan |
|---|---|---|---|---|---|---|
| Penetrating | High | Excellent | Moderate | Natural | 24 hours | 5-10 years |
| Acrylic | Low-Moderate | Good | Low-Moderate | Glossy/Satin | 4-12 hours | 1-3 years |
| Epoxy | High | Poor-Moderate | Excellent | High Gloss | 24-72 hours | 3-5 years |
| Polyurethane | High | Good | Good | Glossy/Satin | 12-24 hours | 2-5 years |
| Polyaspartic | Very High | Excellent | Excellent | Customizable | 2-4 hours | 7-10+ years |
Why Polyaspartic is the Best Concrete Driveway Sealer
While traditional concrete driveway sealers certainly have their place, polyaspartic coatings are like the smartphone compared to a flip phone – they’re the next evolution in concrete protection technology. At Galaxy Concrete Coatings, we’ve seen how these advanced solutions outperform older technologies in virtually every category.
Polyaspartic coatings were originally developed for bridges, industrial floors, and other high-demand applications. Now homeowners can enjoy this same industrial-strength protection for their driveways.
Superior Durability is perhaps the most compelling reason to choose polyaspartic. These coatings create an incredibly tough surface that stands up to abrasion, impact, and wear far better than traditional sealers. Your driveway can handle heavy vehicles, dropped tools, and the scraping of snow shovels without showing damage.
The Quick Curing time is nothing short of remarkable. I remember a customer in Cincinnati who was amazed that she could park on her newly coated driveway the very next day. “With my previous epoxy coating, I couldn’t use my driveway for almost a week!” she told me. Polyaspartic coatings can be ready for foot traffic in 2-4 hours and vehicle traffic in as little as 24 hours.
UV Resistance is where polyaspartic truly shines compared to epoxy. I’ve seen too many yellowed epoxy driveways that look aged and unattractive after just a couple of years in the sun. Polyaspartic coatings maintain their clarity and appearance even after years of sun exposure – crucial for driveways that face constant UV exposure.
When it comes to Chemical Resistance, polyaspartic provides exceptional protection against everything your driveway might encounter – from oil leaks to gasoline spills, road salt to fertilizer runoff. This means fewer stains and less deterioration over time.
The Temperature Flexibility of polyaspartic coatings is another game-changer. In places like Denver or Indianapolis where temperatures swing dramatically, polyaspartic won’t crack in the cold or become soft in extreme heat.
For homeowners concerned about curb appeal, polyaspartic offers numerous Appearance Options. These coatings can be customized with color chips, metallic effects, or other decorative elements to create a unique, attractive surface that makes your home stand out in the neighborhood.
While the initial investment in polyaspartic might be higher than some traditional sealers, the Long-Term Value is undeniable. When you consider the extended lifespan and reduced maintenance requirements, polyaspartic coatings typically work out to be the most cost-effective choice over time.
As one of our clients in Phoenix put it, “I wish I hadn’t wasted money on two rounds of acrylic sealer before finding polyaspartic. I could have saved money in the long run by going with the best option first.”
Learn more about Concrete Coating Types
How to Seal Your Concrete Driveway
Whether you’re applying a traditional concrete driveway sealer or opting for a high-performance polyaspartic coating, proper preparation and application are essential for achieving the best results. Follow these guidelines to ensure your sealing project is successful.

Preparing Your Driveway for Sealing
Proper preparation is arguably the most important step in the sealing process. Even the best sealer will fail if applied to a poorly prepared surface.
Before diving in, take time to carefully inspect your driveway. Look for cracks, spalling (that flaky concrete that’s starting to come loose), and any pitting that needs repair. Don’t forget to check for oil stains – these sneaky spots require special cleaning attention. Also note any previous sealers that might need removal and check for moisture issues, especially in those shaded areas that never seem to dry out completely.
Now for the cleaning – this is where your sealer’s success really begins! Start by sweeping away all the loose debris. Those fallen leaves and dirt might seem harmless, but they’ll ruin your sealer’s ability to bond properly.
For those stubborn oil spots (we all have them), apply a good concrete degreaser, give it a thorough scrub with a stiff brush, and rinse thoroughly. Trust me, oil and sealer are not friends – if you skip this step, you’ll be staring at those spots for years to come.
Next, clean the entire surface with a pressure washer (aim for 2500-3000 PSI) or use a concrete cleaner with a stiff brush if you don’t have access to a pressure washer. For smooth concrete or surfaces with previous sealers, you might need to acid etch or mechanically grind the surface to create a profile for the new sealer to grip onto.
After cleaning, give your driveway a thorough rinse to remove all cleaning agents and allow it to dry completely – this typically takes 24-48 hours. I know it’s tempting to rush this step, but as one concrete expert told me, “The most common reason for sealer failure is improper surface preparation. Skipping or rushing the cleaning and drying steps virtually guarantees disappointment.”
Before sealing, address any damage you found during inspection. Small cracks (less than 1/4 inch) can be filled with a concrete crack filler, while larger cracks need a proper concrete patching compound. For spalling or pitting, apply a concrete resurfacer to restore a smooth surface. And remember – let all these repair materials cure completely according to the manufacturer’s instructions before moving on to sealing.
As for tools, you’ll want to gather a broom, leaf blower, pressure washer, concrete cleaner/degreaser, stiff bristle brush, appropriate repair compounds, a putty knife or trowel, and safety equipment like gloves and eye protection. Having everything ready before you start makes the whole process much smoother.
Step-by-Step Guide to Applying Concrete Driveway Sealer
With your driveway properly prepared and repaired, you’re ready for the main event – applying your concrete driveway sealer. While the exact process varies by product type, these general steps will guide you through most sealer applications.
First, check the weather forecast – this is crucial! You’re looking for temperatures between 50°F and 85°F, no rain for at least 24 hours, and relatively low humidity. Avoid extremely hot, sunny days as they can cause the sealer to dry too quickly, leading to an uneven finish. I once ignored the forecast and paid the price when an unexpected shower ruined hours of work. Learn from my mistake!
Gather your application tools before starting. For penetrating sealers, you’ll need a low-pressure sprayer or roller. Film-forming sealers require a paint roller with an extension handle and a paintbrush for edges. Don’t forget plastic sheeting to protect adjacent surfaces, a paint tray for film-forming sealers, any necessary mixing equipment, and appropriate safety gear.
If your sealer requires mixing, follow the manufacturer’s instructions precisely. Stir thoroughly to ensure even consistency, and resist the urge to dilute unless specifically directed. Proper mixing ensures even color and performance throughout your project.
When applying the first coat, start at the highest end of your driveway and work toward the lowest point. This helps control runoff and prevents pooling. For penetrating sealers, apply evenly with a sprayer or roller, avoiding puddles. For film-forming sealers, use a roller with 3/8″ to 1/2″ nap, applying in thin, even coats.
Work in manageable sections (about 4′ x 4′) and maintain a wet edge to prevent lap marks. Use a paintbrush for edges and tight areas. Remember – thin coats are always better than thick ones. As one professional from Galaxy Concrete Coatings shared with me, “The key to a successful application is patience. Rushing any step, especially applying too thick a coat, can compromise the entire project.”
After application, allow proper drying time between coats. This typically ranges from 2-4 hours for water-based products and 4-12 hours for solvent-based options. One of the advantages of polyaspartic coatings is their rapid cure time – often ready for a second coat in as little as 1-2 hours, which is why we recommend them for busy homeowners who can’t afford long downtime.
Most film-forming sealers benefit from two thin coats. Apply the second coat perpendicular to the first for even coverage. Penetrating sealers often require only one coat, but always check the manufacturer’s instructions to be sure.
The final step is allowing proper curing time. Keep all traffic (including feet!) off the surface during curing. Typical curing times for traditional sealers range from 4-24 hours for foot traffic and 24-72 hours for vehicle traffic. This is another area where polyaspartic coatings shine – they’re often ready for vehicles in 24 hours or less, meaning minimal disruption to your daily routine. Most products reach their full curing and maximum hardness after 7-14 days.
Common Mistakes to Avoid in Concrete Driveway Sealing
Even experienced DIYers can fall victim to common sealing pitfalls. Being aware of these mistakes will help ensure your concrete driveway sealer performs as expected.
Overapplication is perhaps the most common error I see. Many people think more sealer means more protection, but applying too much can lead to bubbling, blistering, a cloudy appearance, extended drying time, peeling, and a dangerously slippery surface. As one decorative concrete expert shared, “I hardly ever get customers asking for a gloss look anymore. Many people apply too thick a coat thinking more is better, but with sealers, less is often more.” The solution is simple: follow the manufacturer’s recommended coverage rate and apply thin, even coats.
Poor weather conditions can doom your project from the start. Too hot, and your sealer dries too quickly, causing roller marks and poor adhesion. Too cold prevents proper curing. Too humid leads to haziness and extended drying times. And rain? Well, that can wash away your uncured sealer completely. I learned this lesson the hard way when I ignored a 30% chance of rain and ended up with a streaky, ruined finish. Always check the forecast and plan your application when temperatures will remain between 50°F and 85°F for at least 24 hours, with no rain expected.
Insufficient preparation is another project-killer. Skipping or rushing preparation steps might save time initially, but you’ll pay for it later when your sealer fails prematurely. Dirt and contaminants prevent proper adhesion. Moisture trapped in the concrete causes clouding or peeling. Oil stains can bleed through the sealer. And previous sealers can cause compatibility issues if not properly addressed. The solution? Invest the time in thorough cleaning, proper repairs, and complete drying before application.
Many DIYers also ignore important safety precautions. Some sealers, particularly solvent-based products, contain volatile organic compounds (VOCs) that can cause respiratory irritation, dizziness, headaches, skin irritation, and even pose fire hazards. Always wear appropriate safety equipment, ensure adequate ventilation, and keep ignition sources away when working with solvent-based products. For a safer alternative, consider low-VOC options or water-based products. Even better, polyaspartic coatings like those offered by Galaxy Concrete Coatings have lower VOC content than many traditional sealers.
Having unrealistic expectations can lead to disappointment. Not all sealers perform the same way – some provide more gloss than others, penetrating sealers won’t fix surface imperfections, and no sealer can prevent all staining or damage. A homeowner once told me they expected their DIY acrylic sealer to look exactly like their neighbor’s professionally applied polyaspartic coating. Unfortunately, that’s just not realistic. Research and select a sealer that meets your specific needs and expectations. For the best results, especially for decorative or high-visibility driveways, consider hiring professionals.
Finally, improper mixing can ruin your project before you even start applying. Failing to mix the sealer thoroughly can result in uneven color, inconsistent gloss, and poor performance in certain areas. One concrete expert shared an example: “I once saw a driveway with dramatic color differences because the contractor didn’t mix the sealer properly. The first section was much lighter than the rest because the thicker resin had settled to the bottom of the pail.” The solution is simple – follow mixing instructions carefully, and stir thoroughly before and occasionally during application.
For more detailed information about concrete sealing best practices, you can check out the Portland Cement Association’s guide to concrete sealers.
For homeowners who want to avoid these common pitfalls altogether, Galaxy Concrete Coatings offers professional polyaspartic coating services that provide superior protection and appearance with none of the DIY headaches. Our one-day installation process and lifetime warranty give you peace of mind that your driveway is protected for years to come.
Why Choose Polyaspartic Coatings Over Traditional Concrete Sealers
Let’s have a heart-to-heart about your driveway’s future. While traditional concrete driveway sealers can certainly do a decent job protecting your investment, polyaspartic coatings take that protection to an entirely new level.
I’ve seen countless driveways transformed with polyaspartic coatings, and the difference is truly remarkable. One homeowner in Denver told me, “I wish I’d known about polyaspartic coatings years ago instead of reapplying acrylic sealer every other summer!”
Superior Durability is perhaps the most compelling reason to choose polyaspartic. These coatings are built like a tank—up to four times more resistant to abrasion than epoxy coatings and lightyears ahead of traditional acrylic sealers. This means your driveway can handle everything from heavy vehicles to dropped tools without showing wear.
The Rapid Installation is another game-changer. Remember when coating a driveway meant your family couldn’t use it for days? With polyaspartic coatings, we can typically complete the entire installation in just one day. By the next day, you’re often back to your normal routine—no more extended disruptions or planning your life around your driveway project.
Living in areas with dramatic weather swings? Polyaspartic coatings offer Extreme Temperature Resistance, maintaining their integrity from bone-chilling -30°F all the way up to scorching 140°F. Whether you’re dealing with Colorado winters or Arizona summers, these coatings won’t crack, peel, or soften.
UV Stability is another area where polyaspartic coatings shine—literally. Unlike epoxy coatings that turn an unappealing yellow when exposed to sunlight, polyaspartic coatings stay clear and vibrant year after year, even under direct sun exposure. Your driveway’s appearance remains as fresh as the day it was installed.
From oil leaks to road salt, driveways face constant chemical exposure. The exceptional Chemical Resistance of polyaspartic coatings means spills can be wiped away without leaving permanent stains. One customer shared how her teenager’s transmission fluid leak cleaned up completely—something that would have permanently stained her previous sealed driveway.
The natural Flexibility of polyaspartic coatings allows them to move slightly with your concrete, accommodating minor seasonal expansion and contraction without cracking or peeling. This flexibility is crucial for long-term performance, especially in regions with freeze-thaw cycles.
Want a unique look? The Customizable Appearance of polyaspartic coatings lets you choose from various gloss levels and decorative options. Many homeowners add color flakes for a terrazzo-like finish that not only looks stunning but also provides additional slip resistance.
The Low Maintenance nature of polyaspartic coatings means more time enjoying your driveway and less time caring for it. The non-porous surface doesn’t trap dirt or absorb stains, making cleanup as simple as a quick rinse with the garden hose. No more annual scrubbing sessions or resealing every couple of years!
Though the initial investment in polyaspartic coatings is higher than traditional sealers, the Long-Term Value is undeniable. When you factor in the extended lifespan (often 10+ years versus 1-3 years for acrylics) and reduced maintenance costs, polyaspartic coatings typically work out to be more economical over time.
Finally, the Professional Results achieved with properly applied polyaspartic coatings simply can’t be matched by DIY sealer applications. Our trained technicians at Galaxy Concrete Coatings ensure a flawless finish that dramatically improves your home’s curb appeal while providing maximum protection.
“The change was incredible,” one homeowner told me after we coated her 20-year-old driveway. “It looks better now than when the house was new, and I love that I won’t have to think about sealing it again for many, many years.”
When you weigh all the benefits, it’s clear why more homeowners are choosing polyaspartic coatings over traditional concrete driveway sealers. The combination of durability, beauty, and convenience simply can’t be matched by conventional sealing methods.
Conclusion: Protecting Your Concrete Driveway Investment
Your concrete driveway represents a significant investment in your home, and proper protection is essential for maintaining its appearance and structural integrity. While traditional concrete driveway sealers offer reasonable protection, polyaspartic coatings provide the ultimate defense against the elements and daily wear.
Maintenance Tips for Sealed Driveways
Taking care of your sealed driveway doesn’t have to be complicated. With a little regular attention, you can keep it looking great for years to come.
Regular cleaning makes all the difference – a quick sweep once a week prevents debris from scratching the surface, while a monthly wash with mild soap and water keeps it looking fresh. I’ve found that a soft-bristle push broom works wonders for routine maintenance without damaging the sealer.
When accidents happen – and they will – prompt stain removal is your best friend. That oil drip from your teenager’s first car or the fertilizer spill from your weekend gardening project won’t become permanent if you tackle it quickly. Keep some gentle cleaner on hand specifically for your driveway emergencies.
Be careful with what you clean with, though. Harsh chemicals can do more harm than good, breaking down your sealer prematurely. I learned this lesson the hard way after using a powerful degreaser that left a dull spot on my beautifully sealed driveway. Stick to products specifically approved for your type of sealer.
During winter months, show your driveway some extra love with proper winter care. Those metal snow shovels might be efficient, but they’re brutal on sealed surfaces. Invest in a good quality plastic shovel instead. And while it’s tempting to melt ice quickly with salt, many deicing chemicals can damage your sealer and even the concrete beneath. Sand provides traction without the harmful effects.
Make annual inspection part of your spring cleaning routine. Walk your driveway carefully, looking for any signs of wear or damage. Catching small issues early can prevent them from becoming expensive problems later. I like to do this on a sunny day when the light makes it easier to spot potential trouble areas.
Resealing Frequency
How often you’ll need to reseal depends entirely on the type of product you’ve chosen. Acrylic sealers are budget-friendly but need refreshing every 1-3 years. Epoxy and polyurethane options typically last 3-5 years before requiring attention. Penetrating sealers offer impressive longevity at 5-10 years between applications.
For the ultimate in durability, polyaspartic coatings often extend 7-10+ years before needing attention – and sometimes even longer with proper care. As one of our customers recently told me, “I was skeptical about spending more upfront for polyaspartic, but I haven’t thought about my driveway in years. It still looks amazing, and my neighbor has resealed his twice in the same period.”
“Resealing is not just an aesthetic choice,” explains a concrete industry expert. “It’s preventative maintenance that can save thousands in repair or replacement costs.”
Benefits Recap
When you properly seal your concrete driveway, you’re not just improving its appearance – you’re making a smart investment in your property. A quality sealer extends your driveway’s lifespan by up to 10 years, protecting against the constant assault of UV rays, moisture, and temperature fluctuations.
The visual change can be remarkable too. A sealed driveway improves appearance and curb appeal, giving your home that well-maintained look that makes a great first impression. I’ve had customers tell me their sealed driveway became their home’s most complimented feature after application.
Perhaps most importantly, proper sealing prevents costly repairs and premature replacement. Concrete replacement isn’t cheap – most homeowners spend between $4,000-$8,000 for a new driveway. Regular sealing is a fraction of that cost.
You’ll also enjoy reduced maintenance time and effort with a properly sealed surface. Cleaning becomes simpler as stains don’t penetrate as deeply, and seasonal care becomes less intensive. And of course, your driveway gains valuable protection against stains, cracks, and deterioration that would otherwise gradually destroy your concrete.
The Galaxy Concrete Coatings Difference
At Galaxy Concrete Coatings, we’ve seen countless driveways transformed by our advanced polyaspartic coating systems. While we recognize that traditional concrete driveway sealers have their place, we’ve committed to polyaspartic technology because we’ve seen how it outperforms conventional options.
What makes our polyaspartic solutions special? For starters, we offer one-day installation with minimal disruption to your life. No week-long projects with your cars parked on the street – most customers can drive on their newly coated driveway the very next day.
The exceptional durability of our coatings stands up to everything from heavy vehicles to dropped tools without showing damage. I remember one customer who accidentally dropped a heavy metal jack on his newly coated driveway during a tire change – he was amazed to find not even a mark where it landed.
Our coatings also provide superior resistance to UV damage, chemicals, and stains. That means no yellowing in the sun, no staining from oil leaks, and no damage from road salt in winter. And with customizable appearance options, your driveway can complement your home’s exterior perfectly, whether you prefer a subtle matte finish or decorative chip patterns.
We back all this with an industry-leading lifetime warranty for complete peace of mind. As one of our customers recently put it, “It’s the last driveway coating I’ll ever need to buy.”
Learn more about our Driveway Coating solutions
We serve homeowners in Cincinnati, OH, Denver, CO, Indianapolis, IN, Phoenix, AZ, and Tucson, AZ. Contact us today for a free consultation and find how our advanced polyaspartic coatings can transform and protect your concrete driveway for years to come.